1. Direction is Key
If you can, refrain from setting your camera facing East or West. Unless you want a memory card full of pictures of nothing but the sun during prime hours, face your camera north or south and you’ll be much happier with the end result. I think we’ve all learned this lesson the hard way.
 2. Check to see if it works
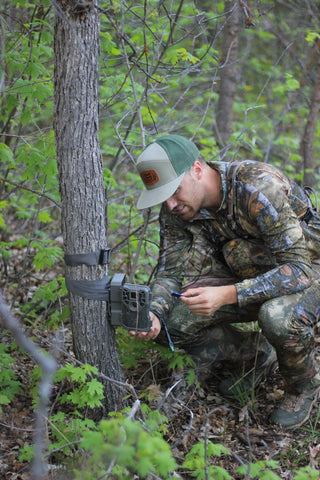
As big of a hurry you may be in, or as tired as you might think you are; ALWAYS make sure you take a test pictures of yourself walking by the camera to make sure that the camera is at the right height and distance and is working properly. Depending on the camera, some have a wider-angle lens than others, so you need to take a picture to make sure the subject fits great in the shot. You don’t want to be that person that hikes in to check his camera weeks later just to find out that the camera angle was off and all the photos are of animal legs. Trust us, it’s worth the extra effort to make sure everything is good to go before leaving.
3. Name your camera
This may sound obvious, but most cameras have the option to give your camera a name and it will print it on each picture’s timestamp. If you’re running more than one camera in the area, this is a must so when you pull the SD card a few weeks later, you won’t get confused and mixed up about which card came from which camera location when you have multiple SD cards you’re dealing with.
4. Settings
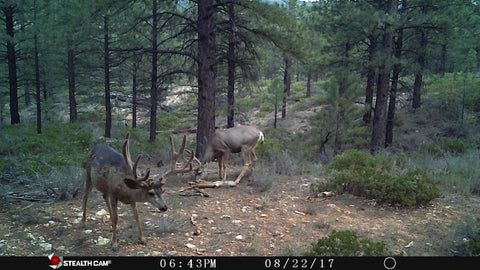
When configuring your camera settings, you need to think of how long you plan on leaving it there before checking it again. If the answer is a long time, then you’ll want to keep your image quality low, delay time longer than a minute and maybe only set it on 2 photo burst. Video is out of the question if you plan on leaving it very long. Recording video is great, but it drains your battery and takes up space on your memory card more than anything else. If you plan on checking your camera within a couple weeks, then you could keep your image quality to high, burst mode of 3, and a delay of only 30 seconds or less and you should be fine to record video. Through trail and error, burst mode of at least 2 photos has yielded the best results for us, which is why we highly recommend using burst mode. Without it, you may only catch the nose, or tail end of a big buck, whereas burst mode gives you multiple shots as the animal is walking by. Finally, please make sure the date and time is correct! One of the main reasons for a trail camera is to figure out what time the animals are coming through, so double check it.
5. Checking your Cameras
The easiest, and quickest way to check your cameras is by having an extra SD card. That way you can quickly just swap the current SD card with the new one. But if you’re like us, and want to save money on less SD cards, you can bring any regular picture camera that takes an SD card and you can insert your trail camera’s card to view the pictures. The only problem with this method is you won’t be able to save your pictures because you’ll hopefully have to clear your SD card because it’s almost full. So, we’d suggest getting a memory card reader that just plugs straight into your phone. Many companies sell them for cheap, and they work great. You’re able to save and download any pictures you like from the memory card directly to your phone.
6. Attractant
Depending on your states laws, using attractants can be a great way to get an idea of what’s in the area if you can’t seem to find a water source or natural passage that the animals use often. A “trophy rock” is probably the most popular, but a killer combo that has worked well for us is a mineral lick, with apple “Buck Jam” poured on the ground, as well as some “Deer Cocaine”. This combo works great for both elk and deer. Try a few different things to see what works best in your area.
7. Strategy
Try to have a game plan when placing your trail camera(s). If you’re in a new area that you’re not familiar with, start by placing your camera near a water hole or in highly trafficked areas, and use attractants if legal in your state. This will give you an idea of the animals in the area, and the overall age class. If you’re trying to pattern a specific buck or bull, then your strategy might be different. Rather than putting your camera in highly trafficked areas, or areas that you can glass him, put your cameras on the trails leading to all his possible bedding areas and escape routes. The goal here is to figure out his every move so you can be one step ahead of him come hunting season. Try to stay away from using attractants when “patterning” a buck or bull. You don’t want to put out any foreign scent that might make him change his natural patterns. Just be careful not to bump him when placing or checking a camera.
 8. Analyzing
Once you have your pictures or video it’s time to make a game plan. From all the data you have collected you should now know what’s in the area, what time, how frequent, and from what direction the animal is coming. Use this information to help keep yourself one step ahead.
9. Etiquette
With cameras getting stolen more frequently, letting people know simple trail camera etiquette can go a long way. Don’t do anything to someone else’s camera that you wouldn’t want others doing to yours. This may sound obvious, but some people forget that just because they find a camera in the mountains doesn’t mean it’s free to take.
10. Have Fun
The beauty about setting trail cameras is that they are your eyes on the mountain 24/7. There’s just something about hiking up to a trail camera that you haven’t checked in a couple weeks and looking through the pictures. You never know what you’ll find!
If we missed any key tips about successful trail camera strategy, be sure to leave it in the comments!
]]>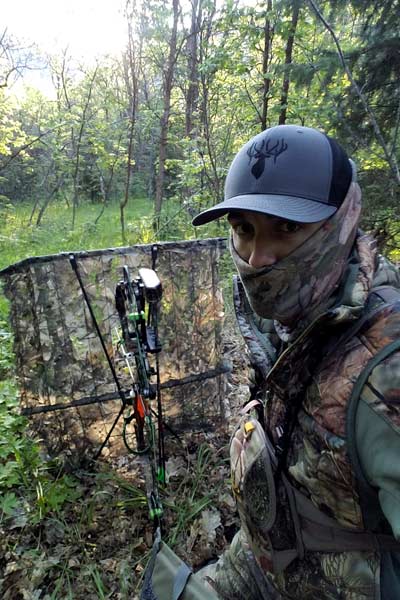
 Once you’ve found these areas, it’s about patterning the birds. The use of trail cameras is an essential tool for scouting your area. Set these up in key areas of traffic for a couple reasons. First, to assure you that there are actually birds in the area to hunt and secondly, learn their pattern. Trail cams will provide time stamps when the birds walk-by, which gives you valuable insight for when you should be sitting in your blind.When looking for ideal areas for turkeys, keep in mind what they like. They prefer large trees for roosting – oaks in the Midwest and East, and cottonwoods or pines in the West. They need access to food and water – they love bugs, acorns, and crops. A location where there is easy access to openness and cover without traveling a long distance is ideal territory for turkeys.